Photo Genres
Street Photography for Beginners
Learn how to start street photography with the right gear, settings, and mindset to capture authentic moments in public places.
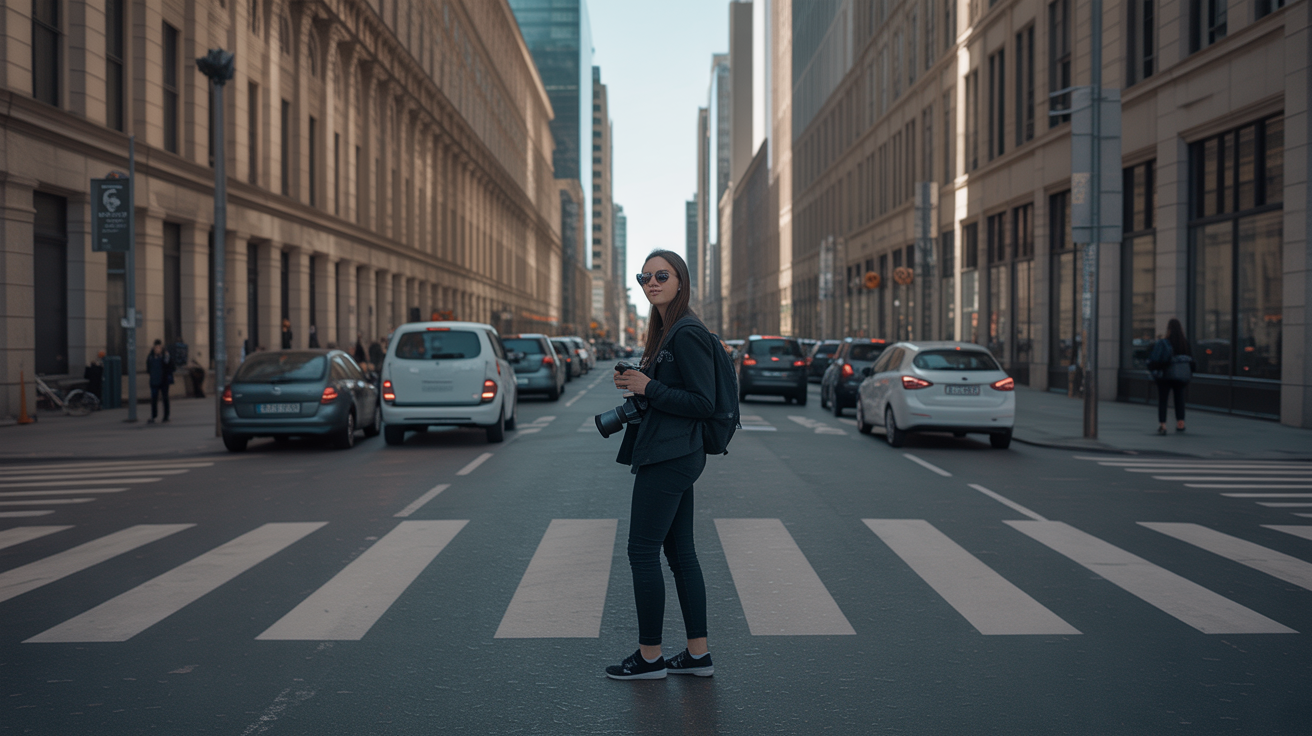
Street photography is one of the most honest forms of the craft. You walk out the door with a camera, and the entire world becomes your subject. There are no props, no studio lights, and no second chances when a stranger laughs at exactly the right moment. That unpredictability is what makes it so rewarding.
Choosing Your Gear (and Why Simpler Is Better)
You do not need expensive gear to start. What you need is a camera small enough that people barely notice it and a lens that matches how humans naturally see the world.
Most street photographers lean toward a 35mm or 50mm equivalent focal length. A 35mm gives you a slightly wider view, useful in tight alleys or busy markets. A 50mm feels closer to natural human vision and compresses the scene just enough to feel intimate. Either works well. Zoom lenses are fine too, but a prime lens forces you to move your feet, which builds a more deliberate shooting habit.
Mirrorless cameras and compact cameras with fixed lenses are popular for a reason. They are quiet, light, and draw less attention than a large DSLR with a big zoom. That said, if a DSLR is what you have, use it. Gear matters far less than being present and ready.
Street Photography Settings That Actually Work
Getting your settings right before you step outside removes hesitation in the moment. Here is a solid starting point:
- Mode: Aperture-priority (A or Av) with the aperture set to f/8. This gives you enough depth of field that small focusing errors do not ruin the shot.
- ISO: Auto, with a ceiling of around 3200 or 6400 depending on your camera's noise performance. This lets the camera adjust as you move from bright sunlight into a shaded doorway.
- Shutter speed: Aim for 1/250s or faster. In aperture-priority mode, watch the shutter speed readout. If it drops below 1/125s in dim conditions, raise your ISO floor manually.
- White balance: Auto works well in mixed urban lighting.
- Focus mode: Continuous AF (called AI Servo on Canon, AF-C on most others) keeps moving subjects sharp.
A common alternative to autofocus is zone focusing. Zone focusing means you manually pre-set the focus to a specific distance, say 2 meters or 10 feet, close the aperture to f/8 or f/11 for a wide depth of field, and then shoot without waiting for the camera to lock. At f/8 focused at roughly 3 meters, almost everything from about 2 to 6 meters will be sharp. Many experienced street photographers love this because it is instant with zero shutter lag. Try it once you are comfortable with your camera.
How to Work Discreetly Without Feeling Awkward
The biggest hurdle for most beginners is not the technical side. It is the social side. Walking up to strangers and pointing a camera at them feels uncomfortable at first, and that is completely normal.
A few things help. First, act like you belong. Walk at a normal pace, stand with purpose, and avoid hunching over your camera. Nervous body language draws more attention than the camera itself. Second, shoot from the hip occasionally. Hold the camera at waist level and frame by instinct. You will miss shots this way, but you will also capture candid moments that a raised camera would have interrupted. Third, make eye contact and smile when someone notices you. A genuine smile defuses most situations before they start.
You do not have to ask permission every time, but asking can lead to better portraits and more interesting conversations. If someone objects to being photographed, simply delete the image and move on. No single photo is worth a confrontation.
The Legal and Ethical Side
Laws around photographing people in public vary by country, so it is worth doing a quick search for the rules in your area. In many places, including most of the United States, the United Kingdom, and much of Europe, photographing people in publicly accessible spaces is generally permitted without asking. But "legal" and "ethical" are not always the same thing.
Use common sense. Photographing someone in a moment of distress, illness, or vulnerability deserves more thought than photographing someone laughing at a market stall. If you intend to publish or sell an image, especially one where a person is recognizable, a model release is often required even if capturing the shot was legal. When in doubt, ask. Most people are flattered.
If your style runs more toward candid portraiture than wide street scenes, the guide on Portrait Photography for Beginners: Settings and Tips covers lighting and framing in more detail.
Reading Light and Choosing Your Background
Good street photography is not just about the subject. It is about how the subject relates to everything around them.
Early morning and late afternoon give you warm directional light that carves shadows across faces and creates depth. Overcast days are underrated for street work because the soft, even light flatters almost any subject without harsh shadows. Rain is particularly rewarding. Wet pavement reflects signs and storefronts, puddles give you natural frames, and umbrellas add geometry and color.
Background matters as much as foreground. Before you press the shutter, glance at what is behind your subject. A cluttered background distracts. A plain wall, a shaft of light, or a repeating pattern adds structure. Positioning yourself so the background complements the subject is a skill that develops over time, but noticing it is the first step.
For a different approach to using light and environment, the techniques in Landscape Photography for Beginners translate surprisingly well to urban scenes, particularly around composition and finding the right time of day.
Practical Street Photography Tips for Your First Outing
- Pick one location and stay. Wandering covers ground but misses depth. Stand near a busy corner or a market entrance for 30 minutes and watch what happens repeatedly.
- Shoot more than you think you should. Memory cards are cheap. Hesitation kills candid moments.
- Look for layers. Foreground interest plus a mid-ground subject plus a background element creates a three-dimensional image even in a flat print.
- Chase light, not subjects. Find a beautiful patch of light and wait for someone to walk through it.
- Review your shots critically. After each outing, identify the one image you are most proud of and ask why it works. Then ask what you would change.
- Vary your distance. Get closer than feels comfortable at least once per session. Some of the most powerful street images were made from less than a meter away.
If you enjoy close-up work and the idea of capturing small details in a big world appeals to you, Macro Photography for Beginners is worth a look for a completely different but complementary way of seeing.
Frequently Asked Questions
Do I need to ask permission before photographing someone on the street?
In most countries, photographing people in publicly accessible spaces without permission is legal. That said, asking is always courteous and sometimes leads to better images. If someone asks you not to photograph them or to delete an image, comply without argument.
What is the best focal length for street photography?
Most beginners find 35mm or 50mm equivalent focal lengths the easiest to work with. They are wide enough to include context but tight enough to isolate a subject. Avoid very long telephoto lenses when starting out. They create distance (literally and figuratively) and make it harder to feel connected to the scene.
Is street photography safe?
For the most part, yes. Be aware of your surroundings, keep your camera strap on your wrist in busy areas, and trust your instincts. If a situation feels uncomfortable, leave. Your safety is more important than any photo.
What settings should I use on a cloudy day?
On overcast days, try aperture-priority at f/5.6 to let in slightly more light, auto ISO with a ceiling of 3200, and a minimum shutter speed of 1/250s. The soft light on cloudy days is very forgiving and produces clean, even exposures with little effort.
How do I get over the fear of shooting in public?
It gets easier with repetition. Start by photographing scenes and architecture with people in the background, rather than leading with close-up portraits. As your confidence grows, move closer. Many photographers find that a small, quiet camera helps because it draws less attention and feels less intimidating to both parties.